In our digital age, the ability to capture and share screenshots has become an essential skill.
Whether you are troubleshooting an issue, documenting a process, or simply sharing a moment, knowing how to take screenshots on various operating systems is invaluable.
In this step-by-step guide, we will explore the methods for capturing screenshots on Windows, Linux, macOS, and even Chromebook systems.
By the end of this comprehensive guide, you’ll be a screenshot maestro across multiple platforms.
Why Screenshots Matter
Before we dive into the technicalities, let’s understand why screenshots are so crucial in our daily digital interactions.
Screenshots serve as visual aids, simplifying complex information, providing evidence in troubleshooting scenarios, and enhancing communication.
Whether you are a professional needing to demonstrate a process or an everyday user capturing a funny moment, screenshots are your go-to tool.
Windows: The Screenshot Haven
Step 1: Snipping Tool
Windows users have a built-in gem called the Snipping Tool. To access it, press the “Windows” key, type “Snipping Tool,” and open the application.
Once there, select the type of snip you want, whether it’s a free-form snip or a specific window. After capturing, you can annotate or highlight areas as needed.
Step 2: Snip & Sketch
For Windows 10 and above, Snip & Sketch provides an enhanced screenshot experience.
Press “Windows + Shift + S” to open the snipping bar, select the area to capture, and the screenshot is saved to your clipboard. From there, you can edit, annotate, and share as required.
Step 3: Keyboard Shortcuts
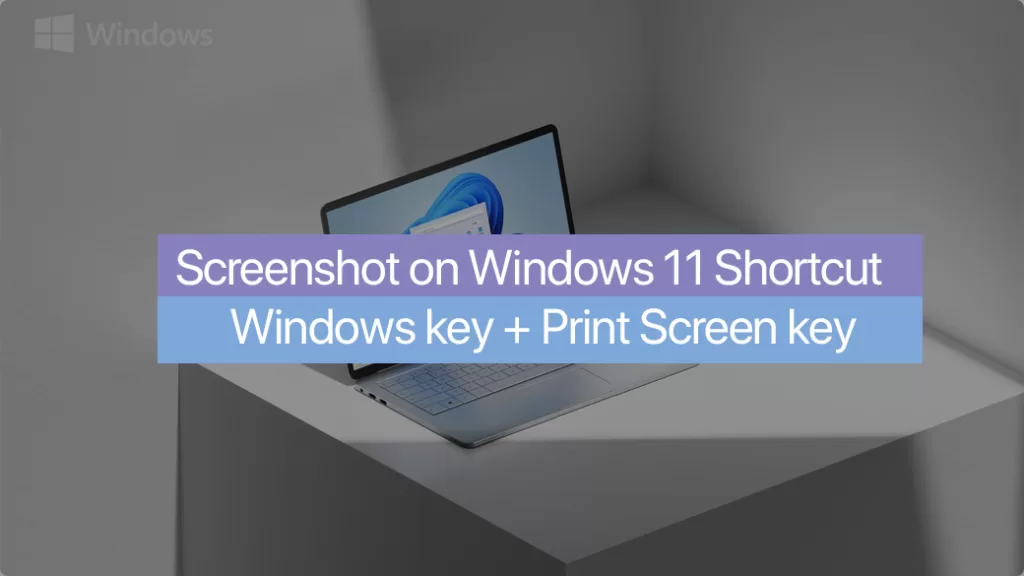
Windows offers powerful keyboard shortcuts for quick captures. Pressing “PrtScn” captures the entire screen, while “Alt + PrtScn” captures only the active window.
Get familiar with these shortcuts for swift and efficient screenshotting.

Step 4: Editing Tools
Once you’ve captured your screenshot, Windows provides robust editing tools.
Open the screenshot in the built-in Paint application or any other image editing software to add annotations, highlights, or even crop the image.
Linux: The Open Source Screenshot Frontier
Linux users, fear not; capturing screenshots is equally accessible on your open-source playground.
Step 1: The Classic Way with “Print Screen”
Most Linux distributions allow you to capture the entire screen by pressing the “Print Screen” key. For more control, use “Alt + Print Screen” to capture only the active window.
The screenshots are typically saved in your “Pictures” or “Home” folder.
Step 2: “Shutter” – Your Screenshot Companion
For a more feature-rich experience, consider using third-party tools like “Shutter.” Install it through your package manager, and enjoy a range of options, including delayed captures, annotations, and easy sharing.
Step 3: Command Line Magic
For the command-line enthusiasts, there’s the “scrot” command. Open your terminal, type “scrot,” and hit enter. This simple command captures the entire screen. Explore additional parameters for more advanced options.
macOS: Screenshot Elegance on a Mac
Mac users, taking screenshots on your sleek machines is a breeze with native functionalities.
Step 1: The Basics – Command + Shift + 3
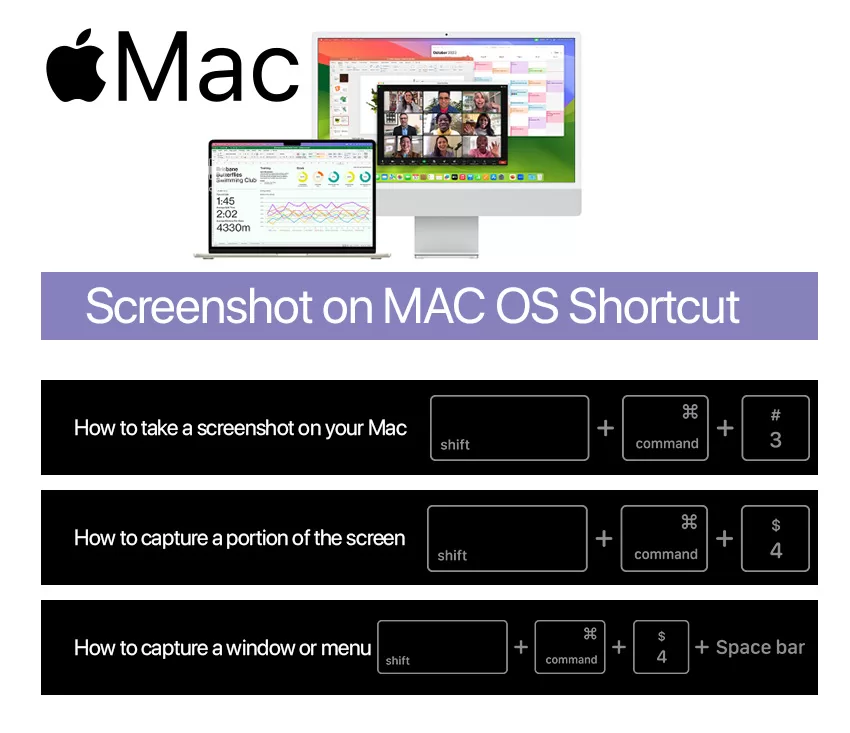
Press “Command + Shift + 3” to capture the entire screen. The screenshot is saved to your desktop by default. For a specific area, use “Command + Shift + 4” and select the desired region.
Step 2: Grab and Preview
Dig deeper into your Mac‘s screenshot capabilities with the “Grab” utility. Find it in your Applications > Utilities folder. For more editing options, use the built-in “Preview” app to annotate and make adjustments to your screenshots.

Chromebook: Screenshotting in the Cloud
Chromebooks, known for their simplicity, also offer straightforward screenshot options.
Step 1: The Dedicated Key
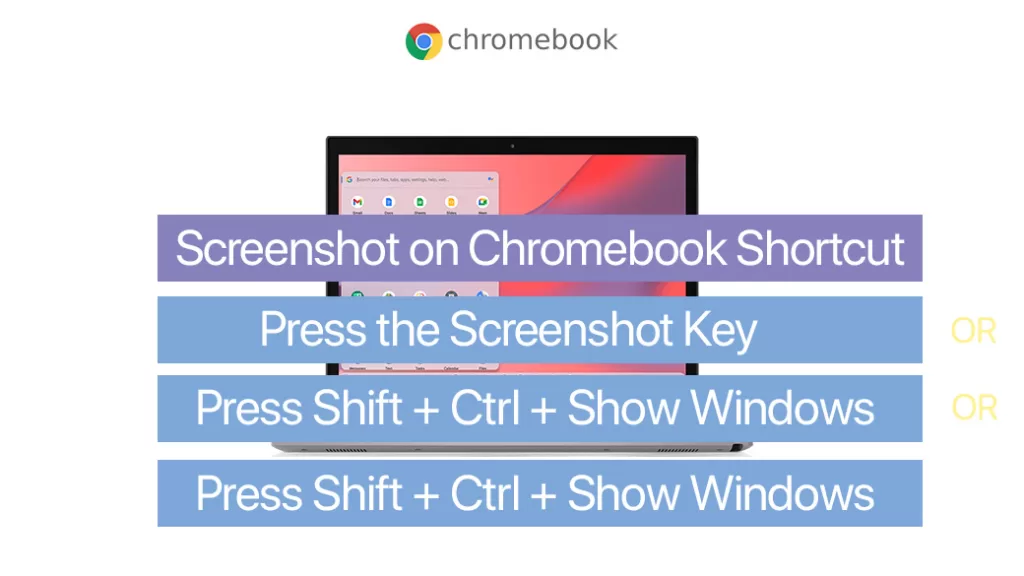
Most Chromebooks come with a dedicated screenshot key. Look for the key that looks like a camera or a rectangle with two lines to capture the entire screen or a part of it.
Step 2: Shortcut Combo
If your Chromebook lacks a dedicated key, press “Ctrl + Show Windows” (usually located where the F5 key would be) to capture the entire screen. For a specific area, press “Ctrl + Shift + Show Windows” and select the region.
Step 3: Files App Integration
Your Chromebook’s screenshot automatically gets saved in the “Downloads” folder. To access it, open the “Files” app and navigate to “Downloads.”

Cross-Platform Tools: When Harmony is Key
For those who juggle between different operating systems, having cross-platform screenshot tools can be a game-changer.
Lightshot: Capture with Precision
Lightshot is a versatile tool available for Windows, macOS, and Linux. Install it, and you can capture screenshots with precision, annotate, and share seamlessly across platforms.
Snagit: Feature-Rich and Cross-Platform
Snagit is another powerhouse that works on Windows and macOS. With a myriad of features, including scrolling captures and video recording, Snagit ensures a consistent experience across different systems.
Best Practices for Screenshot Management
Now that you’ve mastered the art of screenshotting let’s talk about managing the aftermath.
Organize Your Screenshots
Create dedicated folders for your screenshots. Whether it’s for work, personal use, or specific projects, having an organized structure makes finding the right screenshot a breeze.
Naming Conventions
Adopt a clear naming convention for your screenshots. Include relevant details such as date, project name, or a brief description. This small practice can save you from the chaos of a cluttered screenshot library.
Troubleshooting Common Issues
Encountering issues with screenshotting is common. Let’s troubleshoot a few common problems.
Blank Screenshots
If your screenshot turns out blank, it could be due to a conflict with certain applications. Close unnecessary applications or consider using a different screenshot tool.
No Saved Screenshot
If you can’t find your screenshot, check your default save location. It might be set to a different folder. Adjust the settings to ensure your screenshots go where you expect them.
Tips for Enhancing Screenshots
Now that you’ve captured the screen, let’s elevate the visual appeal of your screenshots.
Resolution Matters
Adjust your screenshot settings for optimal resolution. Higher resolution screenshots retain clarity, especially when zoomed in.
Editing Tools
Explore the editing tools available on your system. From basic annotation to advanced editing, enhancing your screenshots can make them more informative and visually appealing.
Screenshot Etiquette: Respect and Privacy
Screenshots can sometimes capture sensitive information, and it’s essential to respect privacy and permissions.
Ask for Permission
Before capturing and sharing screenshots that involve others, always ask for permission. Respecting others’ privacy fosters trust and a positive online environment.
Blur Sensitive Information
If your screenshot includes sensitive information, use editing tools to blur or redact that information. This extra step ensures that you share only what you intend to.
Accessibility Considerations: Making Screenshots Inclusive
In the quest for inclusive digital content, it’s crucial to make your screenshots accessible to everyone.
Text Alternatives
When sharing screenshots in a professional or educational context, provide text alternatives. This ensures that individuals using screen readers can access the information effectively.
Contrast and Clarity
Ensure that your screenshots have sufficient contrast and clarity. This benefits users with visual impairments and contributes to an overall better user experience.
Future Trends in Screenshot Technology
As technology evolves, so does the world of screenshot capture. Let’s glimpse into the future.
Augmented Reality Screenshots
With the rise of augmented reality, the ability to capture screenshots within AR environments is a possibility on the horizon. Imagine capturing not just your screen but your entire augmented reality experience.
Advanced Editing Tools
Expect advancements in editing tools. From AI-driven enhancements to more intuitive interfaces, the future promises more sophisticated ways to edit and refine your screenshots.
Conclusion: Capture and Share with Confidence
In conclusion, taking screenshots is a skill that transcends operating systems.
Whether you’re on Windows, Linux, macOS, or a Chromebook, the ability to capture and share your screen is invaluable.
From the basics to advanced techniques, you are now equipped to navigate the diverse screenshot landscape.
Now, armed with the knowledge from this guide, go ahead and capture your digital moments with confidence.
Remember, a well-crafted screenshot not only communicates effectively but also showcases your expertise in the digital realm.


Comments